

What Size Dry Bag Do I Need? Real 5L to 40L Pack Tests
Field Log by Max Sterling — Outfitter Guide, Sealock Marine. Updated post-San Juan River canyon trip.
Let's make one thing clear right out of the gate: if you pick the wrong waterproof pack size, you are going to suffer on the river. You either end up with a bag jammed so tight you can't seal the top, or a massive, balloon-like sack that won't slide into your boat's storage space.
Forget the standard store catalogs that claim a bag has a "20-liter capacity." That number measures the fabric laid completely flat and empty on a factory floor. Out on the water, that math goes straight out the window. I have spent seven seasons losing skin on my knuckles while trying to squeeze over-packed gear into rigid bulkheads. Here is the unvarnished truth about how these liters actually translate to real gear, and how to allocate your space without failing.
⏱️ What Size Should I Choose? (The 3-Second Action Guide)
- First-Time Users & Generalists: $\rightarrow$ Just buy a 20L Dry Backpack. It handles a standalone day trip swap (heavy jeans, flannel shirt, socks), packed lunch container, and your phone flawlessly.
- Kayakers & Paddleboarders: $\rightarrow$ Run two separate 10L stuffer cylinders instead of one massive bag. They distribute ballast weight evenly and slide easily inside narrow bulkheads.
- Overnight Campers & Minimalist Trekkers: $\rightarrow$ Move straight to a 35L or 40L heavy pack. You need the wide diameter to drop compressed sleeping bedding and solo tents directly to the bottom.
- Outfitters & Commercial Fleets: $\rightarrow$ Review the dimensional parameters in our Sealock Custom Fleet Volume Scaling Layout to minimize transport shipping footprints.
1. The Risk Profile: The Real Field Penalties of a Wrong Selection
Before looking at our real capacity tests on the river gravel, we need to address the real-world performance issues you face when guessing your gear footprint. This isn't just about packing neat—it's about basic equipment survival:
- The "Too Small" Trap (Capsize Leaks): Jamming a stuffer sack to the absolute brim means you can only execute two folds at the neck. Under the international IEC 60529 waterproof standard, a roll-top requires a minimum of 3 to 4 tight, interlocking folds to claim an IPX7 immersion rating. Two folds will leak water under hydraulic pressure, flooding your electronics inside 30 seconds of a boat flip.
- The "Too Large" Trap (The Balloon Blocker): Squeezing a half-empty 40L bag means trapping a giant pocket of dead air. Try forcing that unyielding balloon through a narrow round rubber storage hatch of a touring kayak—it will jam at the rim, block your internal rudder cables, and ruin your boat’s weight lines.
- The "Wrong Format" Trap (The Portage Scar): Basic cylindrical stuffer tubes lack shoulder foam padding and sternum buckles. If you attempt to pack 20 pounds of heavy canned food or steel water flasks into a single-strap stuffer sack and carry it over a 4-mile mountain trail bypass, that narrow strap will act like a thin knife blade cutting directly into your trap muscles, leaving raw, painful skin abrasions.
2. Real-World Capacity Teardown: From 5L to 40L
To give you an honest reference, here is the exact gear footprint that fits inside each primary size bracket after achieving a safe, tight 4-roll waterproof seal:
• The 5L Sack — Valuables Only
This is a small pouch, not a clothing bag. Do not attempt to force an adult fleece sweater or travel towel inside; it won't close. During our SUP splash tests, we used this capacity strictly as a protected insert to guard an iPhone 15 Pro, electronic truck keys, a wallet, passport, and a pocket multi-tool. Toss it inside your main non-waterproof rucksack.
• The 10L Cylinder — Day-Hike Auxiliary
This size slides perfectly into standard 8-inch round rubber hatch covers. On my last day-trip loop, the 10L sack easily held a compact emergency windbreaker, a basic trauma first-aid kit, a headlamp, and a 1L stainless water flask. If you are heading out for a calm afternoon of river tubing, this is your baseline.
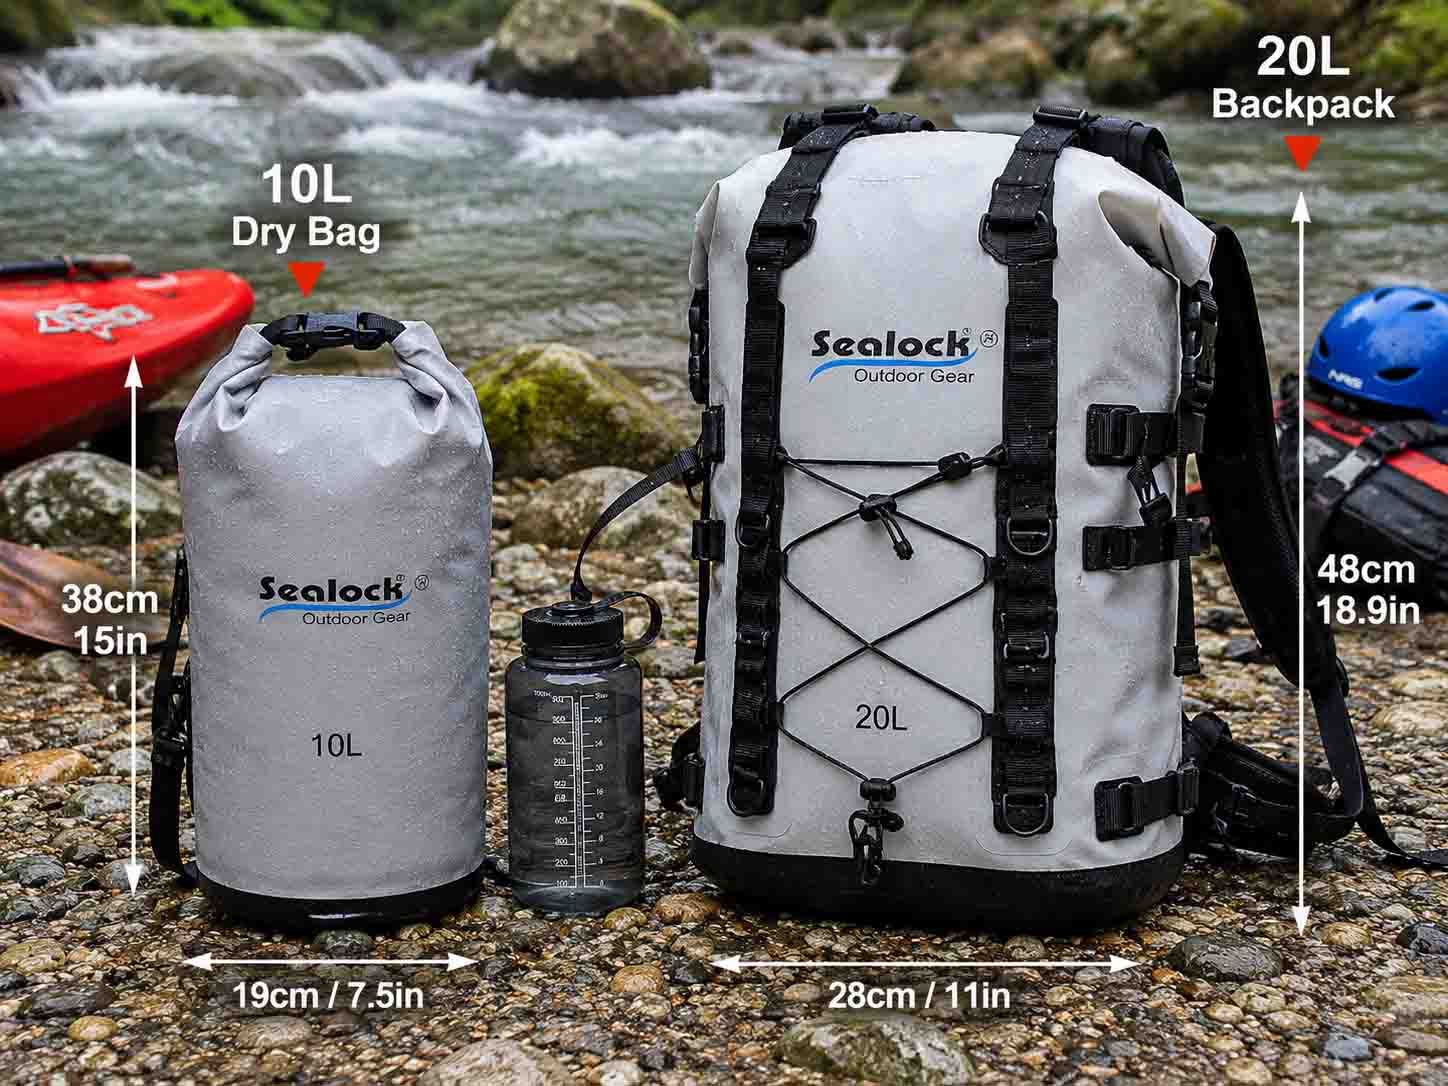
• The 20L Backpack — The All-Purpose Baseline
This is the ultimate day-pack sweet spot. I regularly load a 20L pack with a heavy pair of jeans, a thick flannel shirt, dry socks, a travel towel, and a hard-sided plastic sandwich box. It clips tightly to your kayak deck rigging rows without generating dangerous water drag lines.
• The 30L Pack — The "Frustrating Middleweight"
Here is where packing gets tricky. Most beginners step up to 30L thinking it will handle a weekend campout. It won't. I tried packing a 30L matte TPU sack for a weekend run down the San Juan. Once I dropped in a standard 3-season synthetic sleeping bag (uncompressed), the bag was already 75% full. I had to violently stomp on the bedding just to get three measly rolls at the rim. If you use high-bulk, budget gear, 30L is an awkward trap—it is too tight for camping, but feels loose and floppy for a single day trip.
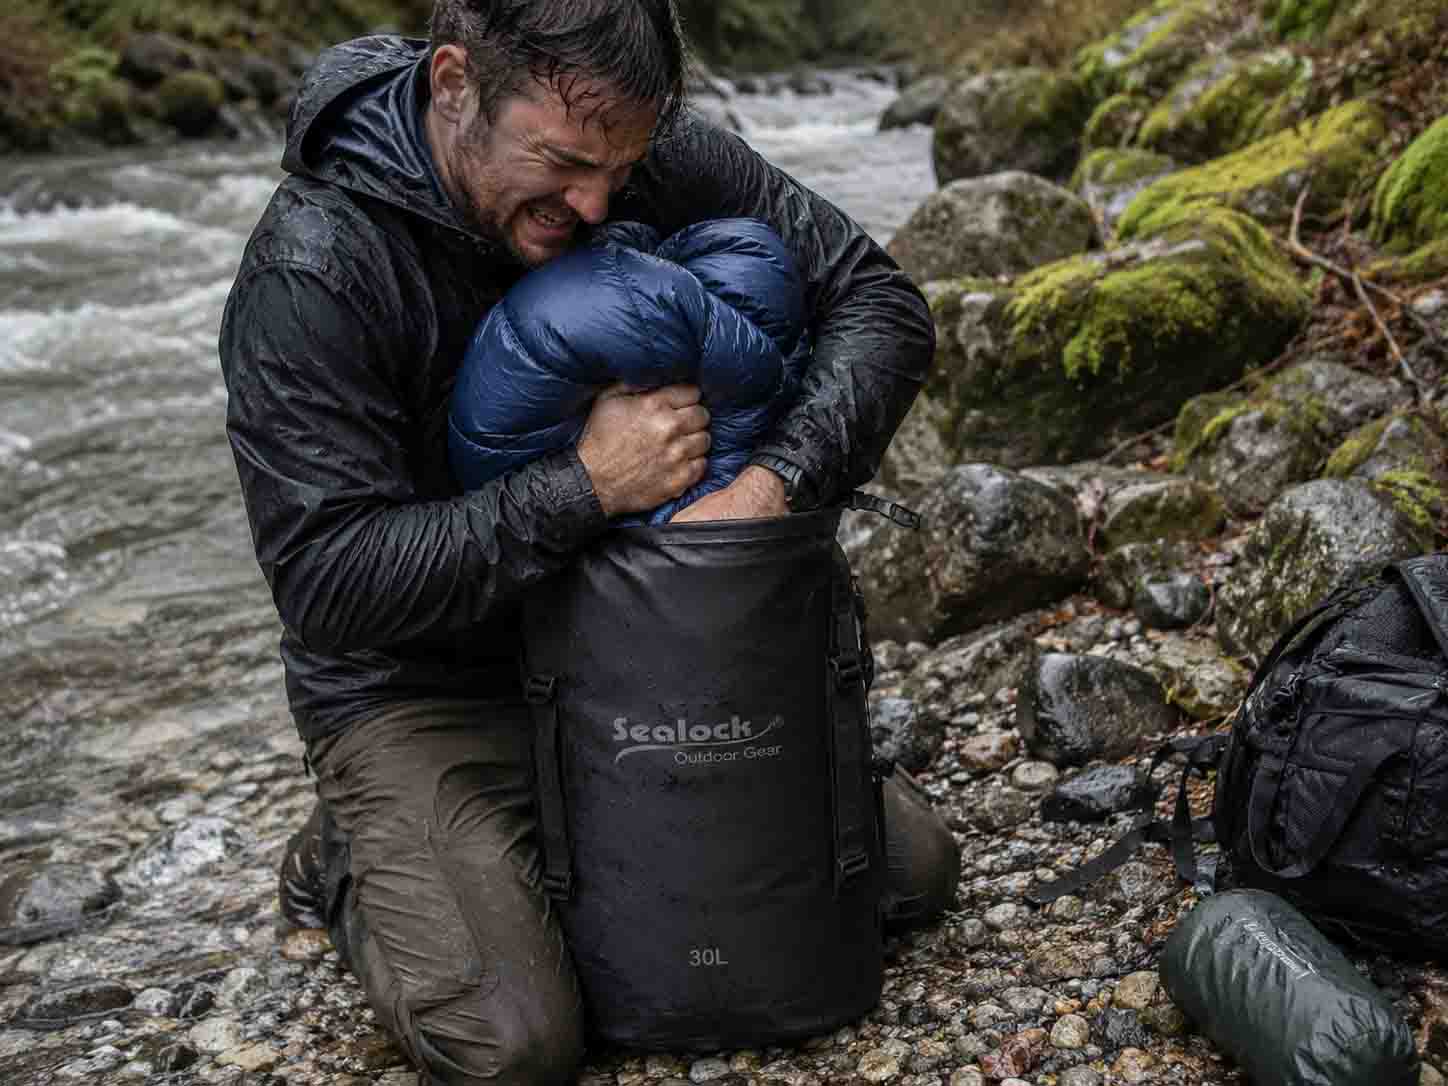
• The 35L Backpack — The Light Overnighter
If you pride yourself on a minimalist setup, skip the 30L and move to a 35-liter dry pack with a waist harness. Those extra 5 liters change everything. A 35L pack comfortably swallows a compressed Therm-a-Rest NeoAir sleeping pad, an ultralight hammock system, a micro stove, and two freeze-dried meal pouches, leaving plenty of neck room for a tight 4-fold roll. It is the absolute max volume you should ever strap flat across a standard Dagger Mamba 8.6 white-water stern deck without creating a tail-heavy tipping hazard.
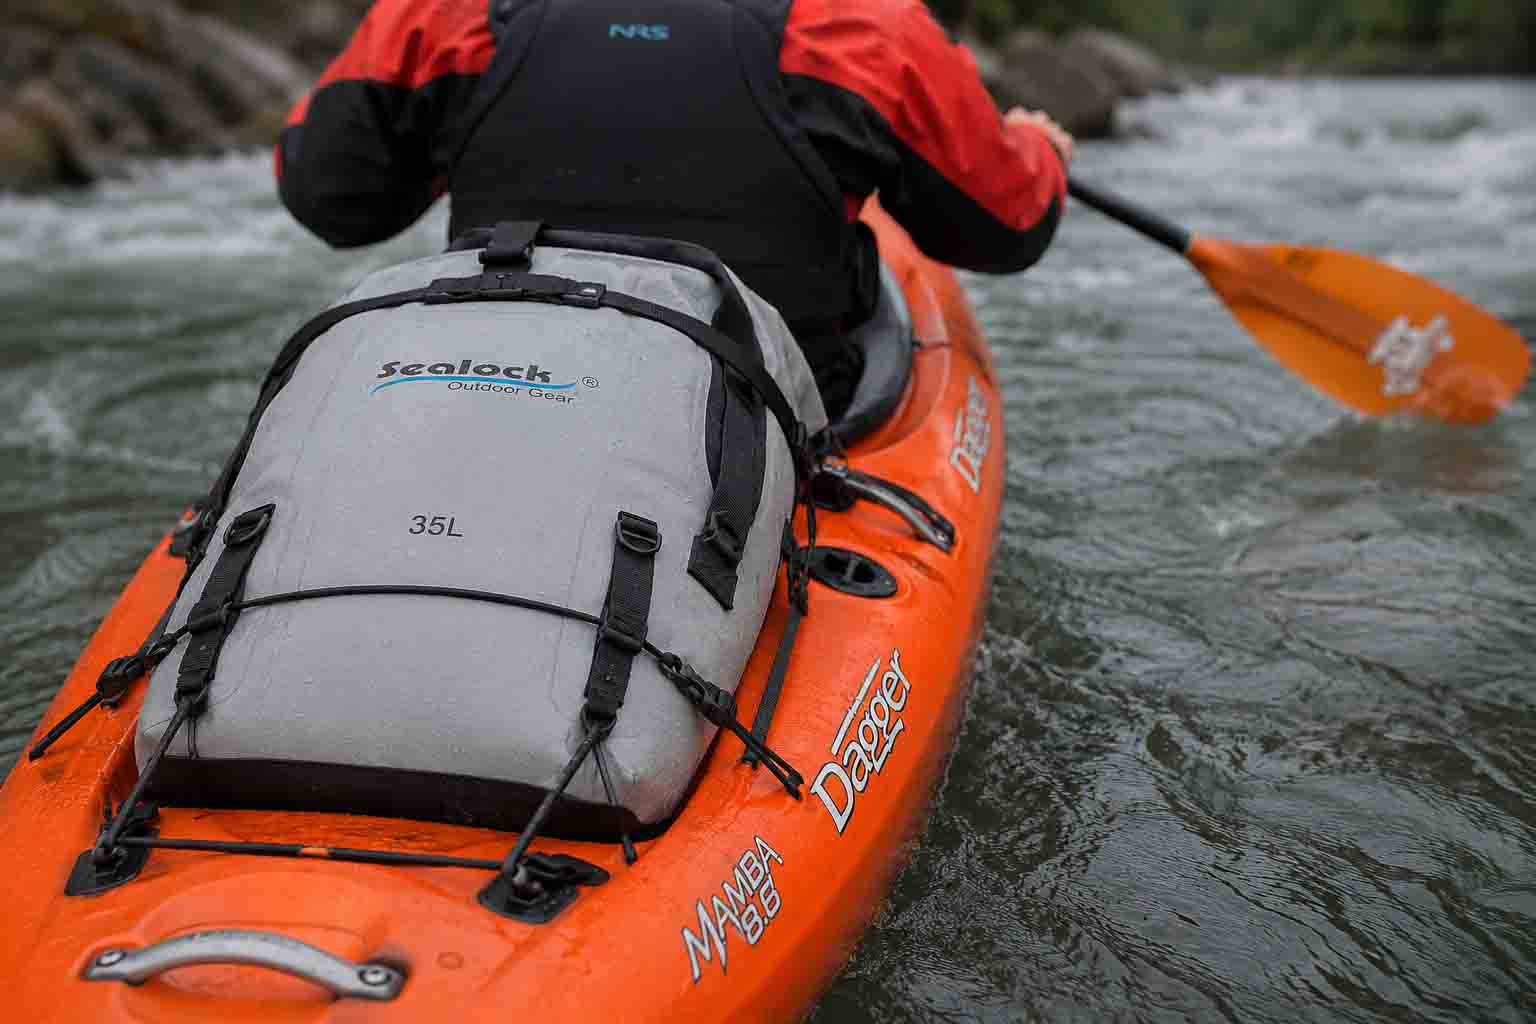
• The 40L Cargo Vault — Multi-Day Wilderness Expeditions
Built strictly for overnight use. It houses bulky down sleeping gear, solo tents, camp stoves, and delicate camera hardware arrays that require separate internal padded cube dividers. Do not use this for short day outings—it turns into an unstable, floppy mess if only half-full.
3. The Roll-Top Geometry Trap: Why You Lose 20% of Your Space
Here is a basic reality check store salespeople always ignore: A roll-top opening consumes exactly 15cm to 20cm of vertical fabric height the moment you seal it closed.
To survive standing water pooling at the bottom of a wet hull deck, you must roll the webbing bar tightly at least four times. Each roll consumes roughly 4cm to 5cm of the bag’s vertical material height. This process drops the real, usable storage capacity by roughly 4 to 6 liters compared to its unrolled flat state.
Speaking of cold weather, here is a massive material trade-off: when the water temperature drops below 40°F, heavy 500D polymer fabrics turn stiff as cardboard. Executing that 4-roll seal requires a firm, painful two-handed squeeze. If you have low hand strength, this material will fight you in winter canyon rapids. If your total gear stack measures exactly 19 liters on land, save your sanity and step up to a 25L or 30L bag to preserve an effortless waterproof seal.
| Bag Tag Size | Real Usable Volume (After 4-Roll Sealing) | Hatch and Hull Compatibility Test |
|---|---|---|
| 5 Liters | ~3.2 Liters Usable | Drops into any tight corner, center console pocket, or day-pack brain. |
| 10 Liters | ~7.5 Liters Usable | Slides easily through tight, round 8-inch touring kayak bow hatches. |
| 20 Liters | ~15.0 Liters Usable | Optimal day capacity. Fits standard bow and stern deck bungee rows. |
| 30 Liters | ~22.0 Liters Usable | Awkward profile. Too tall for small bow bungees; requires deep packing discipline. |
| 35 Liters | ~26.5 Liters Usable | The absolute weight limit threshold for a white-water kayak stern deck. |
| 40 Liters | ~32.5 Liters Usable | Requires a wide oval rear hatch bulkhead or an open canoe stern bed. |
Commercial Fleet Logistics:
For marine rental networks, adventure outfitter agencies, or wholesale labeling partnerships, procurement coordinators can download our certified load displacement schemas through our Sealock Custom Fleet Volume Scaling Layout to streamline container allocation metrics.
4. Common Packing Questions Answered by a River Guide
When you are standing on a muddy boat ramp at 6:00 AM in the rain, nobody wants to read a technical fabric manual. You want fast, direct solutions. Over ten years of guiding canyon river runs, these are the exact questions paddlers yell at me while wrestling with their gear loadouts:
"Max, can I carry a basic dry stuffer tube like a normal trail backpack?"
Only if you want raw, burning strap scars across your shoulder blades by mile two. Basic cylindrical dry sacks are engineered to do one job: sit stationary inside a boat hull or act as a waterproof liner insert tucked inside a standard canvas pack. They have zero foam shoulder padding, no sternum support buckles, and no mesh ventilation grids. Forcing 20 pounds of heavy canned rations or water flasks into a basic single-strap dry tube and hiking over a land portage trail is pure self-punishment. If you have to carry the weight on your spine, buy an integrated waterproof backpack; leave stuffer sacks for the hull compartments.
"How do I prevent my rolled dry pack from ballooning like a football during airline flights?"
You have to purge the dead air mass before you buckle the bar closed. High-end TPU fabrics are entirely air-tight. If you seal a 20L pack full of clothes at sea level and fly up to cruising altitude, the drop in cabin air pressure will cause the trapped air inside to expand violently. The bag turns into a rock-hard ball that won't squeeze under your seat or into flight overhead bins. My routine is simple: pack your gear, roll the neck down twice, throw your full upper body weight against the bag until the excess air hisses out of the throat, then quickly finish the remaining folds and snap the buckle closed. A squished, semi-pliable pack clears carry-on baggage checkers with zero friction.
"What is the actual functional difference between waterproof and water-resistant pack ratings?"
Water-resistant protects against a brief afternoon shower; waterproof survives a three-hour soaking at the bottom of a flooded boat floor. Standard outdoor gear uses nylon fabrics treated with a thin water-repellent spray and stitched together with traditional thread needles. Every single needle hole is an open door for water leaks under hydrostatic pressure. Marine-grade TPU packs use high-frequency RF welding to fuse the plastic edges together at a molecular level, turning two sheets into one solid, seamless wall. If your bag spends the afternoon sitting in pooled bilge water inside a kayak cockpit, water-resistant zippers will seep moisture within 15 minutes. You need the interlocking 4-roll seal to handle real standing pressure.
"What is your secret for removing river mud and rancid fish odor from a sticky TPU liner?"
Never spray chlorine bleach onto a high-end polymer bag unless you want to peel the coating right off the weave fabric. Dried river silt acts like micro-sandpaper inside buckle tracks, and fish blood rots nylon stitching over winter storage. When I return from an ocean or rapids tour, I immediately blast the entire bag inside and out with a garden hose to clear out loose gravel grit. Next, wash the interior liner using a soft sponge mixed with a simple biodegradable dish soap and warm fresh water. Wipe the track lanes clean, apply a micro-layer of protective silicone lubricant if it uses an airtight mechanical zipper track, and hang the backpack upside down in a shaded garage with strong cross-ventilation. Storing a damp dry bag closed inside a hot plastic gear storage bin is a guaranteed way to wake up to a bio-hazard of mold next season.